
Holiday Gift Guide 2015: Best Accessories for Apple TV
Update: Latest Apple TV update broke the Plex hack, here is how to fix it.
Earlier this week we reported that it’s now possible to run Plex on non-jailbroken Apple TV 2 and Apple TV 3, as group of devs (Baa, roidy and f00b4r) has released a PlexConnect, a little hack that allows a fully-functional Plex client on non-jailbroken ATV2 and ATV3. You can find more details here.
And here is a tutorial on how to get it all working using a Mac:
(via PlexConnect wiki)
Note: This guide can also be used with firmwares prior to 5.2 and those with Apple TVs on wireless connections, just use some common sense for changing the DNS on the ATV and leave the subnet mask and router settings as they are (the screens are slightly different for this bit only).

- Ensure that your PlexConnect machine always has the same IP address
In order for PlexConnect to work the Apple TV has to have its DNS server changed to that of the ATV. In order to ensure that the device’s IP does not change you need to need to either set a DHCP reservation or static IP in your router for the device and then make a note of it. Click here for a Lifehacker guide on how to set this up.
- Configuring your ATV
1. On your Apple TV, go to Settings -> General -> Network -> Ethernet (if you are connected via wireless select that instead)
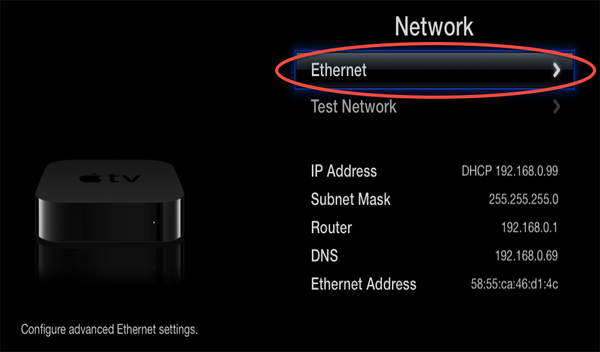
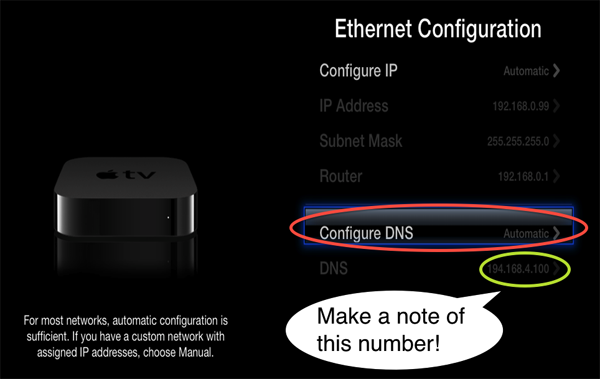
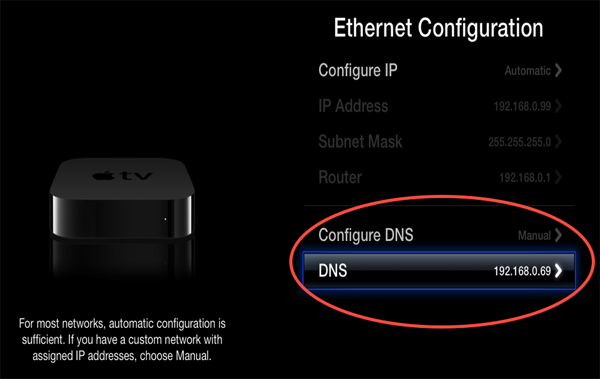
2. Make a note of the current DNS server (you will need to add this into your PlexConnect settings later) and then click on the ‘configure DNS’ button:
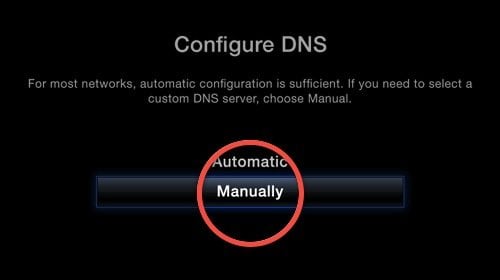
3. On the ‘configure DNS’ screen click on the ‘manually’ button:
4. On the ‘configure DNS’ screen change the IP address to that of the local IP of the device that you are running the PlexConnect application on and then click on the ‘done’ button (if you are using a firmware prior to 5.2 and it asks you to configure the IP address of your router and the subnet mask leave them as they are):
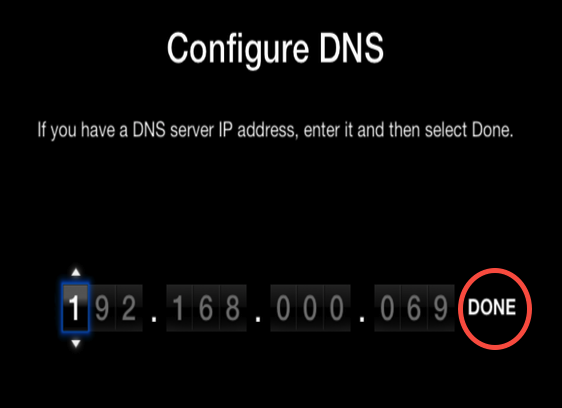
5. It should return you to the previous network configuration screen, check that the DNS server is set to manual and that the IP address is now that of the machine that you are running PlexConnect on:
- Downloading, installing and configuring PlexConnect
- Download the latest zip from Github here.
- Place it in a directory of your choosing on the machine you wish to run PlexConnect on and unzip it.
- Open the “Settings.py” file using TextEdit
- OPTIONAL: edit the line “return ‘8.8.8.8’ # google public DNS”, replacing the “8.8.8.8” with your DNS server, the one you noted down from the ATV before you changed it (if this was your gateway you can instead choose to use your ISP’s DNS server).
- Save the file
- Open a terminal window and change its directory to that of the PlexConnect folder (either by typing “cd”, without the quotes, hitting space and then dragging the folder to the terminal window and hitting return or by enabling the really useful ‘new terminal at folder’ right click command).
- Type “sudo ./PlexConnect.py”, without the quotes and hit return.
- It will then ask to enter your password for your Mac, so enter this and hit return (it will not show anything as you type!).
- You should see output in the terminal as PlexConnect starts.
- Open the Trailer application on your Apple TV and you should see the PlexConnect interface appear.
- Enjoy!
Note: if you have any issues please refer to this before posting.
Specific guides targeting the different firmwares and wireless connections will follow.
Holiday Gift Guide 2015: Best Accessories for Apple TV


Comments
Be The First to Comment