Just in case you were unaware, XBMC has finally released an Eden copy of XBMC for your old Apple TV (1st generation). Though this 1st gen device is not the easiest to load XBMC on to, it is by no means impossible. If you simply follow these steps, from beginning to end, you will be enjoying unlimited multimedia goodness in no time.
Before we start, there are some basic requirements that are absolutely necessary for this installation process.
- Computer (Windows or MAC)
- USB port and ATV USB Creator (grab it from the link provided and download it to your machine)
- A Flash Drive (USB Stick) that is a minimum 512MB.
- A 1st Generation Apple TV that has been updated to the latest software, version 3.0.2!
BE SAFE: To be on the safe side, make sure that you have unplugged all other USB drives from your computer before continuing. USB Creator does erase whatever drive you are using, so you want to make sure there is nothing vital loaded on any devices plugged in once we begin.
1. Download the ATV USB Creator and save it onto your system.
2. Insert your flash drive into your computer and format it to FAT32. Be aware that this step will erase anything located on your USB stick.
3. Open and run the ATV USB Creator software that we downloaded in step #1.
4. Once the software opens up, select the following options:
– Where you see “Choose an Installation” select “ATV-Patchstick”
– You don’t need to do anything for “Download AppleTV Update DMG or Choose a DMG”. ATV USB Creator will automatically download this file from Apple’s servers, so you don’t need to do anything there.
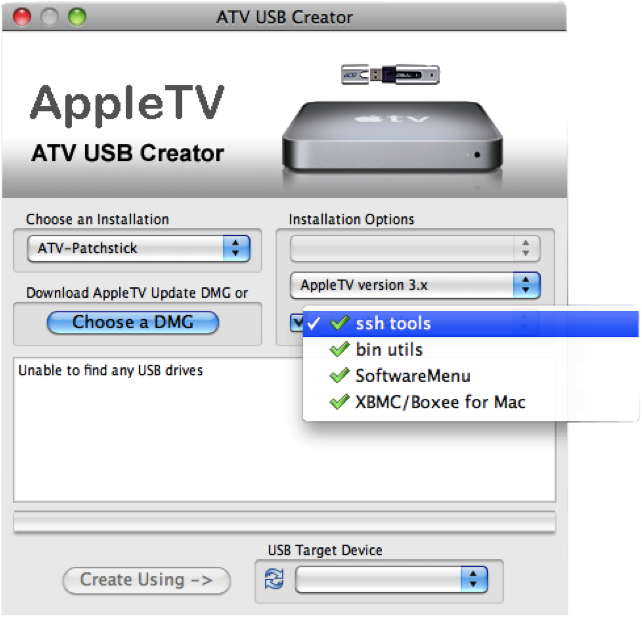
– For “Installation Options” you should not need to change anything. “AppleTV version 3.x” should already be selected, and there should already be check marks for “ssh tools”, “bin utils”, “SoftwareMenu”, and “XBMC/Boxee for Mac”
– For “USB Target Device” select the USB drive you plugged into your computer in step #2. You may need to hit the refresh button for it to show up. Now you can click on “Create Using ->”
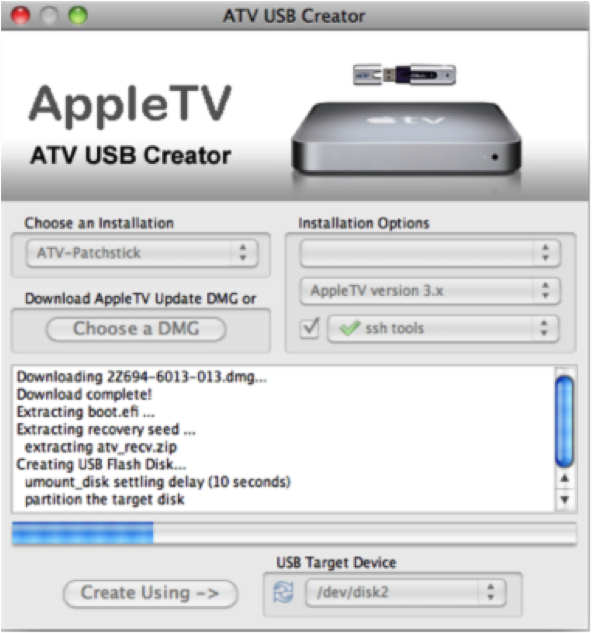 – When the USB drive patchstick is done being created you can then remove it from your computer.
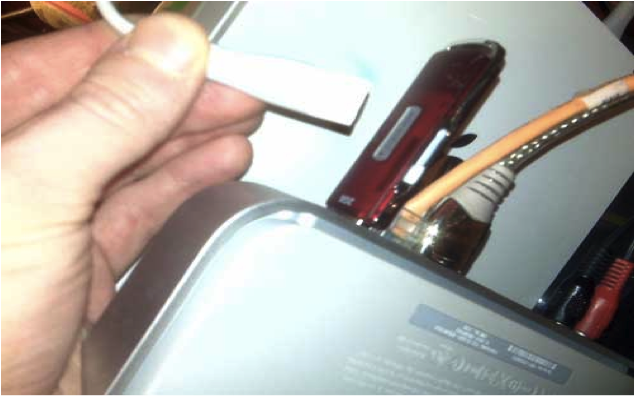
5. Unplug your Apple TV and insert the USB drive patchstick into the back of your device.
6. With the flash drive plugged into the back of your Apple TV, plug the power cable back in. As the Apple TV begins to power up it should now be loading from the flash drive. Now we will wait for the picture of a Penguin (Tux) sitting on an Apple TV. If you do not see this picture when you boot up, and the Apple TV 1 just boots up normally, you likely need to create a new USB drive patchstick using a different USB drive (preferably using a different brand). This problem isn’t often, but it does happen.
7. After the installation is finished, the screen will say that you can reboot. When you see this screen, remove the USB drive patchstick and then unplug (& then) re-plug the power chord to your Apple TV. This will reboot your device.
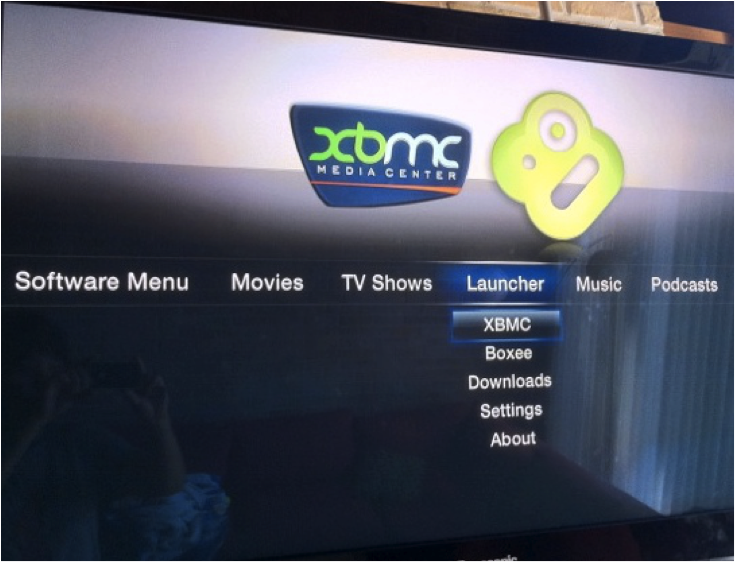
8. You now have ALL KINDS OF GOODNESS installed on your Apple TV. This is most noticeable in the fact that you now have a new option on your HOME SCREEN Menu Bar named “Launcher”
9. From your Home Screen, navigate to the option labeled “Launcher”. Once there continue to “Downloads”, and then select XBMC. This may show more than one entry for XBMC, if so, select the option that says “Stable”.
10. If you are one of the lucky people who have opted to install a new Crystal HD card you should visit stmlabs.com to get more information on Crystalbuntu. It is a different software… that is installed in the exact same manner as the steps listed above.
11. Finally, from the “Launcher” section, head “XBMC” in the sub-menu to start XBMC.
12. Enjoy some amazing new features.
umOuch (Andrew Brasher)
You may also want to read:
XBMC 11.0 Eden for Apple TV 2 5.0 (iOS 5.1) released (+how to install tutorial)
How to jailbreak Apple TV 2 5.0 (iOS 5.1) with Seas0nPass (tethered)
XBMC 11.0 Eden for Apple TV – Review


Comments
Be The First to Comment