You got the Apple TV 3rd gen? Great! So did I! However, if this is your first Apple TV, then you’re probably wondering how to set up apple tv 3rd generation. What’s great about having an Apple TV is that installing it is as easy as using it and in the paragraphs below we’ll tell you everything about it. Let’s go!
Setting up your Apple TV
The first thing you need to understand is that if you want to connect your Apple TV to your TV, then you need to do so by using the HDMI port. This port is used for delivering both video and audio. Before setting up the Apple TV, check the ports on your TV and be sure you have the required cables.
- You will need an HDMI cable to connect your Apple TV to your home theater receiver or TV.
- (Optional) You may also need an optical digital audio cable. This cable can be used if you’d like to connect your Apple TV to a receiver.
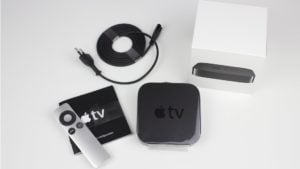
Connecting the cables
At this point you’ll need to connect the cables. Using the HDMI cable, connect one end of it to the back of the TV. The other end should be connected to the appropriate port on the back of your Apple TV. Some people may use an optical digital cable for audio. If that’s the case for you, then be sure to connect one end of it to the appropriate port on your Apple TV (optical digital audio) and the other end to the audio input on your TV or receiver.
Note: The Apple TV features 802.11 Wi-Fi technology, allowing it to connect to your network automatically and wirelessly. However, if you have an Ethernet based network, be sure to use an Ethernet cable to connect your Apple TV to it.
Connect the power cord
One end of the power cord needs to be connected to a power outlet and the other to the power port you’ll find on the back of the Apple TV.
Note: You should never place any objects on top of the Apple TV. Doing so may result in bad signal. Placing the Apple TV on top of electronic equipment is also not recommended.
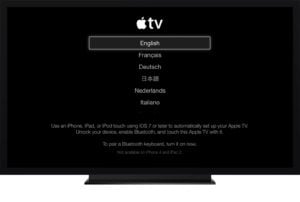
Turn on your TV and select the input
Since this is the first time you’re using the Apple TV, you’ll be greeted by a screen where you have to select your language and network. However, if the only thing you see is a black screen, then don’t worry. All you have to do is check whether the input setting selected on your TV is the same as the input you connected the cables to on your home theater receiver or TV.
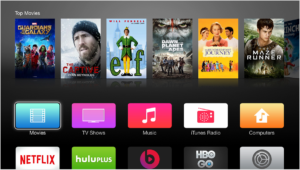
Configuring your Apple TV 3rd gen
If you want to connect to iTunes, then you’ll be very happy to know that the Apple TV can help you configure your wireless network to do so. With iTunes, you can watch and listen to a lot of high quality content from the iTunes library.
Configuring your Apple TV
When configuring your Apple TV, you need to have your Apple Remote, but also your network pass and name ready. The path between the Apple TV and the remote should also be clear. Keep in mind that if you’re on an Ethernet network, then the Apple TV will detect your network automatically. If you’re on a wireless network, then the Apple TV will help you connect to it.
Using the Apple Remote, make sure to enter your network name or select it from the list and then enter the network pass (if you’ve set one).
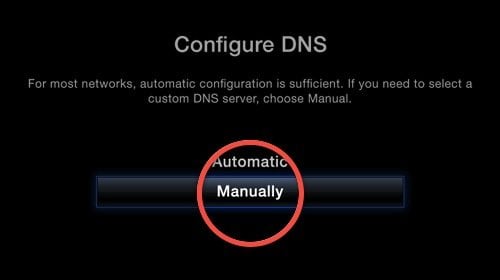
Entering your IP address along with your DNS address, router address, and subnet address may be necessary if you do not connect using DHCP. Be sure to follow the onscreen instructions to complete the network connection.
How to connect to iTunes
If you’d like to use your Apple TV to access the content of your iTunes library, then you need to have the latest iTunes installed (recommended). Any version earlier than 10.5 won’t work so be sure to keep that in mind. If you do have iTunes, but you’re not sure if you have the latest version, then update it. You can do this by using Software Update (if you’re on a Mac). If you’re using a Windows machine, go to iTunes Help to update the software.
How to set up home sharing
Once your network connection is finally set up, you have to set up your Apple TV and iTunes so you can share your iTunes library. To do so, you need to use Home Sharing on both the Apple TV and iTunes. If you’d like to set up Home Sharing in iTunes, then you need to open iTunes, go to Advanced, and there you’ll see Turn On Home Sharing. You’ll now need to enter your Apple ID and your password. Next, click on Create Home Share.
Now, if you’d like to set up Home Sharing on your Apple TV, then you first of all need to go to settings and then to Computers. Here you’ll see an option that says Turn on Home Sharing. Click it and again, enter your Apple ID and pass (the same ones you entered on your laptop or computer).
As you can see, setting up your Apple TV 3rd generation is not hard at all. Just follow these tips and you’ll be able to watch your favorite videos, movies, shows, and also listen to your favorite music in no time!

Comments
Be The First to Comment